Installation of the BarButtons is straightforward: mount it to the handlebars and connect power:
Mounting on the handlebars
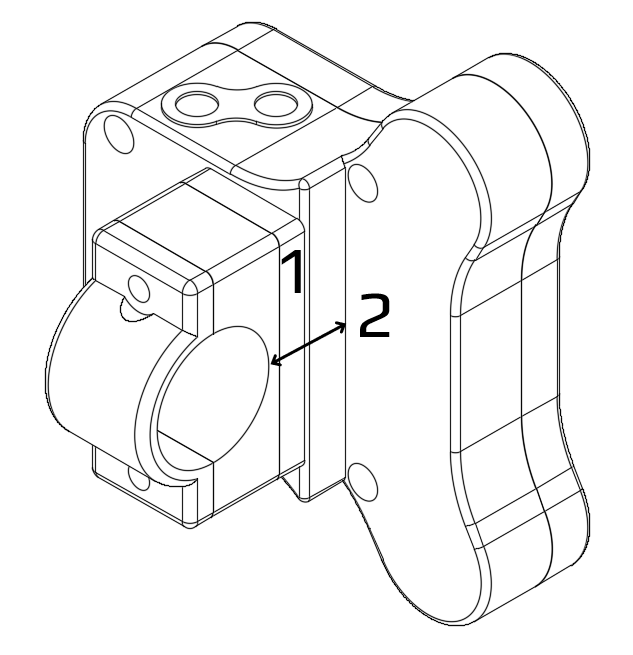
First of all, you need to find out how much space you have between the handlebar and the overhang. When there is only a mirror mount, you usually stay below 10mm. If you have larger controls, you might need 20 or more mm. This is the space outlined in the diagram to the right as nr 2.
By default, the BarButtons have 10mm space, if you require more you can use 1 or more spacers. These are shims of 5mm thichkness that sit between the mount and the back of the BarButtons. (nr 1 in the diagram to the right)
To assemble, you need to have 2 M4 bolts of the proper length. The default (without spacer) is 25mm. If you have 1 or more spacers, use a bolt that is longer.
You can download additional mounting hardware to 3D print here.
Connect power
The BarButtons require a power over USB using a USB-A connector. It is advisable to use a switched USB power source to not drain your battery when you don’t use it. Ensure that the USB connection is shielded from rain. The power consumption is about 80 mA or 0,4W.
Use it
Now use the BarButtons: