GPS tracks are usually saved in a GPX file. In a single GPX file you can have multiple tracks. Every track has a name and a bunch of sequential points on a map. You typically use a GPS app on your phone or online to view these tracks.
If you just want to understand the rough contents of the tracks in a GPX file, it is inconvenient to open the track in a GPS app and see where it goes. Therefore it is easy if you can have an overview map as an image. This page describes how I sometimes make overviews of the tracks in a GPX file.
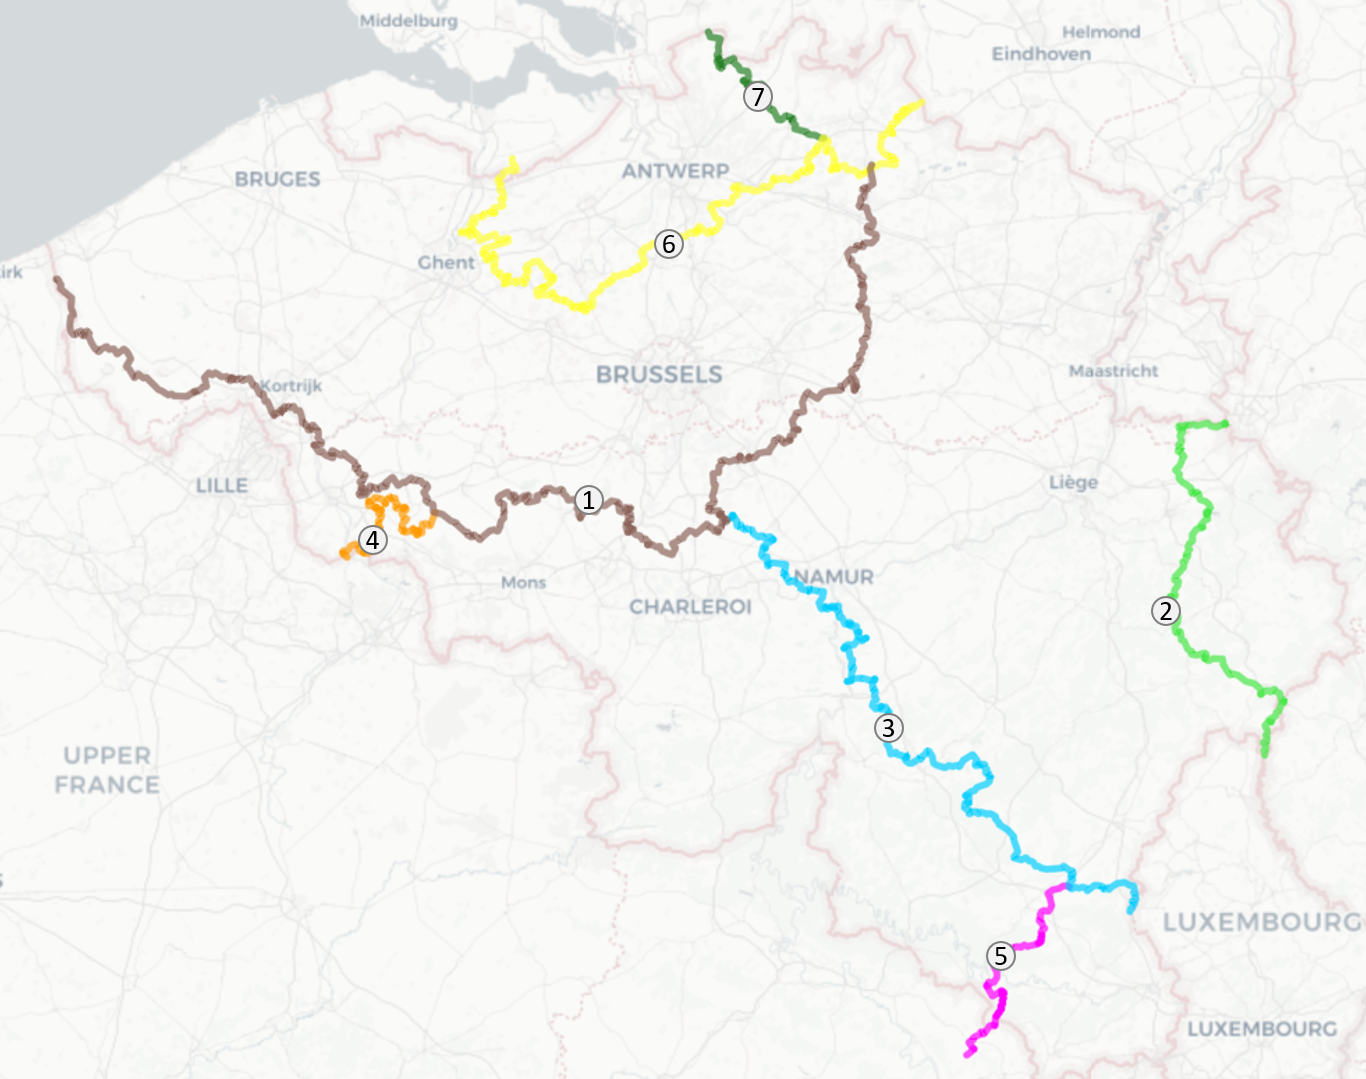
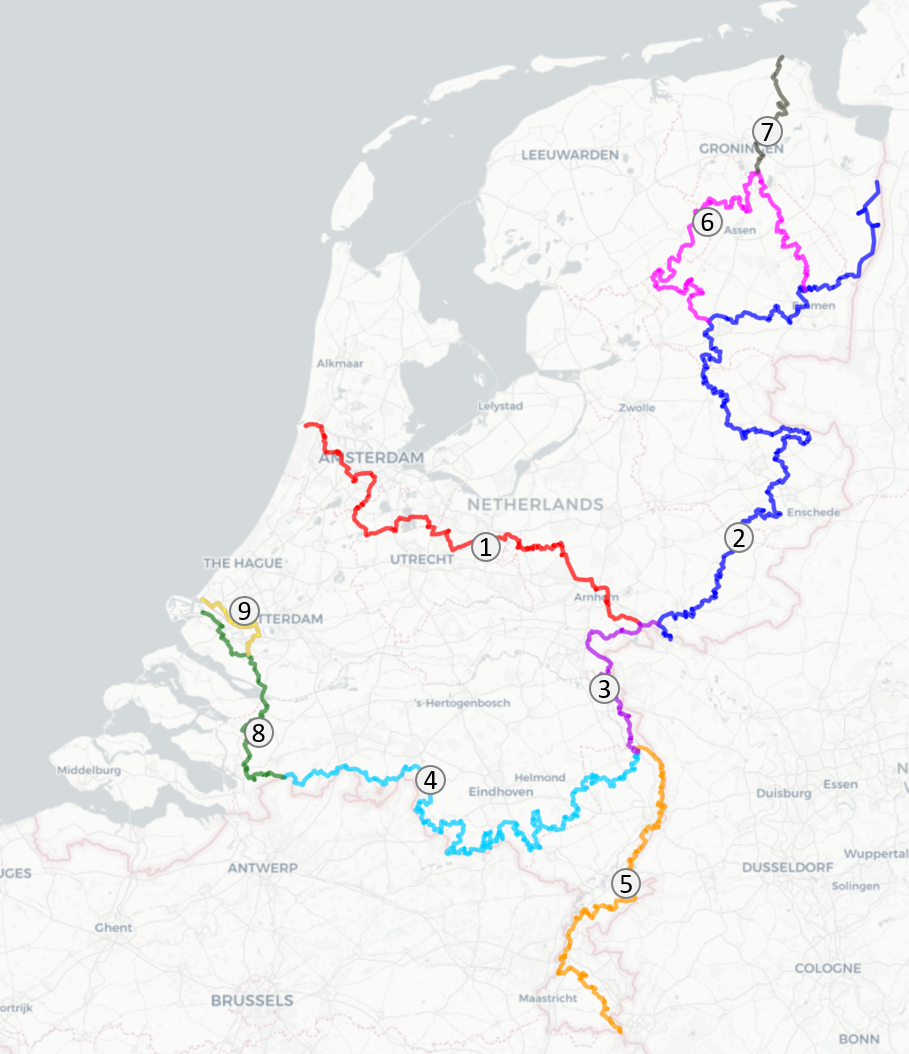
The end result looks like this, for the Trans Euro Trail GPX files of NL and BE. The numbers are the numbers assigned to the individual tracks by the linesmen:
Step-by-step tutorial
- Download the GPX track you want to make an overview of
- Go to gpx.studio and add the Cartovoyager grayscale map layer
- Go to Settings > Map Layers > Custom layers
- Edit the properties of a new layer
- Name: Cartovoyager gray
- URL:
https://b.basemaps.cartocdn.com/rastertiles/light_all/{z}/{x}/{y}.png - Layer type: Basemap
- Enable the new layer via the main screen > click on the layer icon on the top right > choose Cartovoyager gray
- Remove all existing tracks via File > Close all
- Load the GPX via File > Open. This opens all the GPS tracks and shows them as a single track. It also displays the individual points of interest as well.
- Remove the points of interest, since we don’t need those in an overview:
- Click on the selection tool on the left hand side
- Ensure only “Delete points of interest” is ticked, not “Delete GPS points”
- Select all points of interest and hit Delete.
- To clearly see what different GPS tracks (or segments) are in the GPX file, extract them so that gpx.studio gives them a unique color:
- Click on the icon on the left hand side: Extract content to separate items > Extract
- If you don’t like a color of a single track, you can now change it to something else by selecting the track and going to Edit > Appearance.
- Now you have a nice map with the individual tracks.
- Make a screenshot and paste this in powerpoint
- Place identifications on the tracks. For example using a round shape
- Now make a screenshot (in presentation mode) and share with your friends!