Get the components
You need to obtain these items to assemble the BarButtons:
| Component | Amount | Notes |
|---|---|---|
| Buttons | 8 | These buttons are waterproof and fit the case design of the BarButtons. It makes sense to have different colors for the different groups. Can be obtained at: * Yidi at Ali: https://s.click.aliexpress.com/e/_DdrG4mV * PBS-33B at Tinytronics.nl: https://www.tinytronics.nl/shop/index.php?route=product/search&search=pbs-33b |
| Led | 1 | The led is an 8mm waterproof led to signal the status of the BarButtons * https://s.click.aliexpress.com/e/_DlFzgLr |
| Arduino board | 1 | The case and software is built for the Wemos C3 Mini. Both the v1.0.0 and the v2.1.0 versions of the board are compatible. * Wemos official web site: https://www.wemos.cc/en/latest/c3/c3_mini.html * Buy at Ali at the LOLIN store: https://aliexpress.com/item/1005004740051202.html (or https://www.aliexpress.com/item/1005004005736554.html for the v1.0.0) * Buy at TinyTronics.nl: https://www.tinytronics.nl/shop/nl/development-boards/microcontroller-boards/met-wi-fi/wemos-c3-mini-esp32-c3 |
| USB cable | 1 | A USB cable that you can use to provide power to the Arduino. Should be long enough. An old charger cable is usually OK, but you can buy a new cable of course. |
| UTP cable | 1 | Section of UTP cable of approximately 30 cm to solder buttons to the Arduino. I like UTP cable since it’s cheap and color coded. Of course you can use any other cable. |
| M2 screws | 2 | 6mm length, 2,0mm width, philips head. Screws for mounting the Arduino – Available at aliexpress. |
| M3 screws | 4 | 12,6mm length, 2,8mm width, philips head. Screws for case assembly – Available at aliexpress |
| M4 nut | 2 | The case is designed for the regular variety nut, nylock will extrude a bit – Available at aliexpress |
| M4 hex bolt | 2 | M4x25 hex bolt to mount the BarButtons to your handlebar. If you use additional spacers, add 5mm per spacer for the length of the M4 bolts – Available at aliexpress |
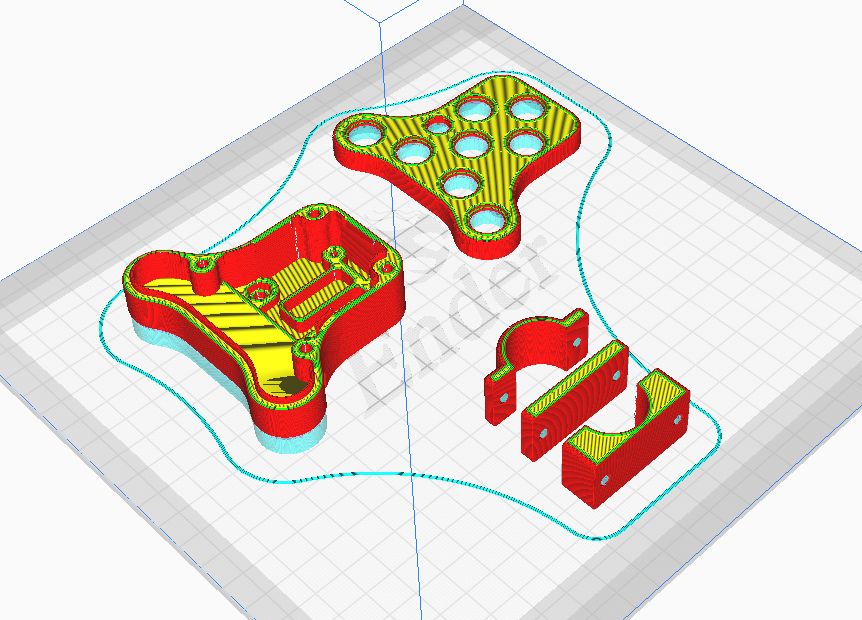
Print it
Download a copy of the latest version of the BarButtons 3D files. They are available as 3MF files here:
The 3MF files should be compatible with most slicers like Cura.
When printing, use these settings as a guide:
- Print with a wall thickness of 4 layers minimum so that the unit is sturdy
- Use a small print width of ~0.12mm, this helps in preventing delamination
- Support overhang of > 45 degrees (if possible)
- Print one component at a time
- Orientation on the print bed:
- Front: print with the front facing upward. This way the front looks best. You do need to remove the support from the inside though.
- Back: print with the back facing downward. This way you only have to remove the support for the overhang that makes room for the mirror
- Bracket, spacer, adapter: print sideways to prevent delamination.
After printing, clean up the results
- Use a 4mm drill to clean up the holes for the handlebar mounts
- Remove the support that filled the mounting holes. You can push it out with a small (< 3mm) object to push from the inside out
- Remove the support in the front panel.
- Remove the support in under the mating surface of the back.
As a convenience tool, you can print a 14 mm tool to easily screw the nuts on the buttons: 14mm-assembly-tool.3mf
Flash it
The Arduino board needs to run the correct software. You have 2 options to flash the software:
- Install via the web installer (easy): https://jaxeadv.com/barbuttons/firmware-flasher/
- Install from source code using the Arduino IDE (not easy)
The option to flash via the Arduino IDE is the rest of this page:
For the BarButtons, the software is written in the Arduino IDE and consists of a single source code file that you can download here:
- Install the Arduino IDE from https://www.arduino.cc/en/software
- Store the downloaded BarButtons Arduino source in a directory of your choosing. Then open it via File > Open.. or double click it. More information about the basics of the Arduino IDE are available here https://docs.arduino.cc/software/ide-v2
- Install the ESP32 board library
- Add the ESP32 boards to Arduino: Go to File > Preferences > Settings > Additional boards manager URLs. Add
https://raw.githubusercontent.com/espressif/arduino-esp32/gh-pages/package_esp32_index.jsonand hit OK. - Open the Boards Manager (Ctrl+Shift+b)
- Install the ‘esp32 by Espressif Systems’ board library. At least install version 2.0.5
- Ensure that the installation is successful by clicking on the dropdown for the board (top left) and choosing ‘Select other board and port…’. Here you should select the ‘LOLIN C3 Mini’ board
- Add the ESP32 boards to Arduino: Go to File > Preferences > Settings > Additional boards manager URLs. Add
- Install the ‘Keypad’ library via the Library Manager (Ctrl+Shift+i). Install the Keypad library by Mark Stanley and Alexander Brevig
- Install the ‘ESP32 BLE Keyboard library’
- Downloading the release from https://github.com/T-vK/ESP32-BLE-Keyboard/releases. Use version 0.3.2-beta.
- Install via the menu Sketch > Include Library > Add .ZIP Library…
- Due to a bug in 0.3.2-beta, a small change needs to be made to
My Documents\Arduino\libraries\ESP32-BLE-Keyboard-0.3.2-beta\BleKeyboard.cpp. On line 130 changepSecurity->setAuthenticationMode(ESP_LE_AUTH_REQ_SC_MITM_BOND);topSecurity->setAuthenticationMode(ESP_LE_AUTH_BOND);
- Update partition scheme of the Arduino (in order to facilitate OTA updates)
- Exit the Arduino IDE
- Update partition scheme by editing this file in a text editor:
%USERPROFILE%\AppData\Local\Arduino15\packages\esp32\hardware\esp32\<version>\boards.txt. (Windows) or/Users/<username>/Library/Arduino15/packages/esp32/hardware/esp32/<version>/boards.txt(Mac). Add an option for ‘Minmal SPIFFS’ to accommodate larger images by adding these lines just belowlolin_c3_mini.menu.PartitionScheme.huge_apparound line 5500:lolin_c3_mini.menu.PartitionScheme.min_spiffs=Minimal SPIFFS (1.9MB APP with OTA/190KB SPIFFS)lolin_c3_mini.menu.PartitionScheme.min_spiffs.build.partitions=min_spiffslolin_c3_mini.menu.PartitionScheme.min_spiffs.upload.maximum_size=1966080
- Start Arduino IDE
- Set partition scheme to ‘Minimal SPIFFS’ via the menu Tools > Partition Scheme. (Ensure that the selected board is still the LOLIN C3 Mini)
- If the partition scheme selection menu is not available, restart Arduino IDE one more time
- On Windows: If you can select a partition scheme, but the ‘Minimal SPIFFS’ option is not available, remove the directory
arduino-idedirectory from%USERPROFILE%\AppData\Roamingand restart the Arduino IDE (due to a bug in Arduino IDE)
Upload the code to the Arduino
- Connect the Arduino to your computer via USB
- Put the Arduino in programming mode: press and hold button 9, press and release the RST button, release button 9. You should hear the the ‘new device’ sound.
- Ensure that the Arduino IDE is connected. If not done automatically, set the port via menu Tools > Port.
- Click on the Upload button in the Arduino IDE (2nd button on top left). This compiles the code and uploads it to the Arduino.
The last few lines of output in the Arduino IDE should look like this:
Writing at 0x000d6aa3... (93 %)
Writing at 0x000dc70e... (96 %)
Writing at 0x000e25ba... (100 %)
Wrote 887664 bytes (540450 compressed) at 0x00010000 in 11.8 seconds (effective 600.5 kbit/s)...
Hash of data verified.

Leaving...
Hard resetting via RTS pin...
Update it
The source code you just flashed is for BarButtons v1.
If you want other features, like multiple keymaps, you can update the firmware of the BarButtons “over the air” using a WiFi hotspot. Please read the instructions for OTA updates here (on the firmware v1 user guide)
Assemble it
Now that you’ve got all the components ready to, go to the next page to assemble it!